You’ve done your research on how to tile a wall, and you’re excited about getting started with your new project; creating an updated, fresh look for your kitchen or bathroom. But there’s one more task that must be considered before diving in: how to remove tiles that are already there.
The good news is that learning how to remove tiles is fairly simple. In fact, tiles can be removed safely and efficiently by adopting an easy 6-step process, which will take you all the way from start to finish:
- Safety first
- Protect your surroundings
- Remove fixtures
- Remove the first tile
- Remove all the tiles
- Clean up
Here’s your simple and straightforward 6-step plan for how to remove tiles safely…
1. Safety First
As tiles will often break or shatter during the removal process, understanding how to remove tiles in the most effective way involves understanding how to stay safe while you’re working. Fortunately, the protective items that you need to minimise risk are all widely available in DIY stores, as well as online.
Safety goggles and gloves to protect the eyes and hands from sharp edges are essential, and you may also wish to put on a dust mask to keep the smaller tile particles out of your nose and mouth. This can be particularly helpful if you’re using the shatter approach, which we’ll discuss in more detail in step 4.
It doesn’t hurt to have a spare pair of hands around, if you’ve got a friend or family member willing to help out with the project. It’s useful to have someone collecting the larger pieces of tile, and putting them straight into a bin or box – rubbish bags can be used as a last resort, but they can often be ripped by sharp tile edges. This will help keep your workspace less cluttered, and may even help to prevent accidents from occurring.
2. Protect Your Surroundings
It doesn’t matter whether you’re working with porcelain or ceramic tiles, or any other form of tile. The fact is that broken tiles can be sharp, and if they’re falling from height they can cause significant damage to whatever they land on. This could be your luxurious hardwood floor, your beloved bathtub, or your brand new cooker top. Protecting the surroundings can reduce the risk of scratches, dents, and damage.
An old bed sheet or a decorating dropcloth may be enough to protect against smaller pieces of tile. However, they may not be enough to prevent damage from larger, heavier pieces. You can create a bit of extra protection and dampen the blow by laying out some flattened cardboard across your surfaces. Place a sheet on top of the cardboard so you can easily wrap up any small pieces during clean up.
3. Remove Fixtures
As we’ll see in step 4, removing that first tile can be quite a challenge, and it’s a challenge that can be made even more difficult to navigate if there are fixtures and fittings in the way. Removing these before getting started can give you the space you need to work efficiently and productively.
The types of fixtures you have – or whether you have them at all – will depend on the room you’re working in, and the area where the tiles are being removed. Fixtures you may be dealing with include light switch covers – in this case, always make sure you turn off the electrical supply to the part of the house you’re working in before removing the cover. They could be toilet roll or kitchen roll holders, or decorative trim if you’re removing floor tiles. Put these items somewhere out of the way, so that they don’t become damaged as you’re chipping away.
4. Remove The First Tile
If you haven’t already done so, now is the time to make sure that everything you’ll need – a chisel, hammer, and utility knife – are placed where you can easily reach them. Now, it’s time to get stuck in!
One of the most challenging aspects when learning how to remove tiles is knowing where to start. Once you have that first tile out of the way, you have access to the next, and the next, and so on… but getting to that first tile is often tricky, even for the most experienced of tilers. There are two different methods for removing tiles, and the slower, steadier technique is often preferred for getting the first one off.
As you won’t have a gap in which to insert the tip of the chisel when working with that tricky first tile, it can be easier to use the grout removal method. This involves using a utility knife to scrape away the grout from around the edge, gently loosening the tile. It’s a technique that’s often used when only a small selection of tiles need to be removed, as it minimises the risk of damage to the surrounding tiles.
However, the grout removal method can be time-consuming. If speed is of the essence, the shatter approach is something to try. This technique involves using the chisel and hammer to create holes across the surface of the tile, causing it to break up. But while it can be quicker, it can also be a lot messier.
5. Remove All The Tiles
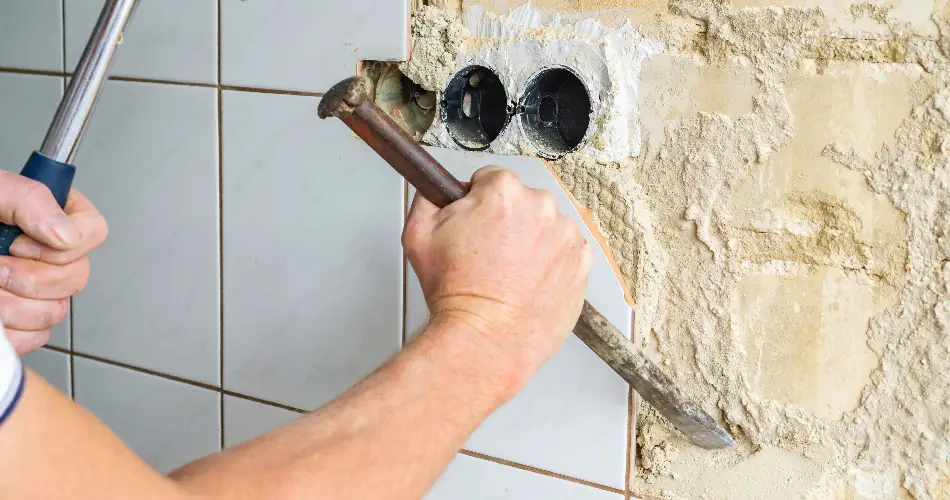
Once you have access to an exposed tile side, it becomes much easier to see how to remove tiles cleanly. Place the tip of the chisel against the exposed side, angling it so that it points towards the back of the tile. Use the hammer to hit the chisel, applying even pressure to slowly ease the tile off the adhesive.
Repeat this at different spots along the exposed edge (and along different edges as you create more gaps) to loosen the tile completely. If you’re having difficulty, you can always resort to the shatter method discussed above. It’s messier, but it can be just what’s needed for particularly stubborn areas.
6. Clean Up
If you’ve used old sheets or drop cloths, cleaning up after removing tiles should be relatively easy. Wrap the sheet up, taking care to collect the corners in your hands, and empty the shards into a bin or box. Tile waste can be disposed of in your regular bin, but you can also take it to your local recycling centre.
Despite best efforts, it’s almost impossible to catch every bit of chiselled tile in sheets and drop cloths. There will always be a few rogue pieces, so it’s worth giving the room a quick sweep and vacuum afterwards. You’ll want to make sure there are no loose pieces lying around which could cause injury, especially to bare feet.
However, before getting started with the cleanup duties, make sure that you really are finished. Double-check that all necessary tiles have been removed, and try to prize off as much of the old adhesive as possible so that your wall or floor is ready to be primed for new tile, or for any other form of covering.


