If your tiles are starting to look a little tired, you may be thinking about kicking off a retiling project. However, before you dive in head first, it’s worth taking some time to examine exactly what the problem is. You might find that there’s nothing wrong with your tiles at all. Instead, it could be old or damaged grout that’s affecting the appearance. Rather than spending time and money retiling, you may be able to replace your floor tile grout and wall tile grout for a fresh look. And it’s easy to do.
Why Do Tiles Need New Grout?
While tiles themselves are designed to last, grout has a much shorter life expectancy. There are many common issues that can pop up with grout. Some of the most frequent problems encountered are:
- Staining on white and light-coloured grout
- Fading on darker coloured grout
- Mould growth
- Recessed grout from wear and tear
- Flaking or crumbling
- Holes and other damage
- Visible tile spacers that were grouted over
Some of these issues are almost impossible to avoid. Staining, for example, can happen very easily. As grout is made from porous materials, stains can quickly become very deep set and hard to remove. Other issues are more preventable, but can still happen if best practices aren’t followed. Grout can become damaged if very harsh cleaning chemicals such as bleach are used. And it can begin to flake quickly if the grout was applied incorrectly, or the wrong type of grout was used.
Can You Grout Over Grout?
Technically, new grout can be applied straight on top of old grout. But there’s a question you need to ask yourself: is it really worth it? There are three major issues with skim coating old grout:
- The new grout will not adhere properly to the edges of the tiles. This makes it more likely to start flaking and crumbling. You could end up in the same situation just a few months down the line.
- If your old grout is flaking and crumbling, new grout is simply putting a plaster over an underlying problem. The crumbling will still be there, and it will likely cause your new grout to flake, too.
- As you’ll only be applying a thin layer of grout on top of the old application, you may still be able to see the old grout underneath – especially with light grout. A skim coat isn’t enough to cover stains.
The only situation in which it may be possible to grout over old grout is when a significant portion of grout has already been lost. When there is enough depth to apply a thick quantity, the chance of good adherence and stain coverage is increased. However, if in doubt, it’s best to start from scratch.
How To Remove Old Grout From Tiles
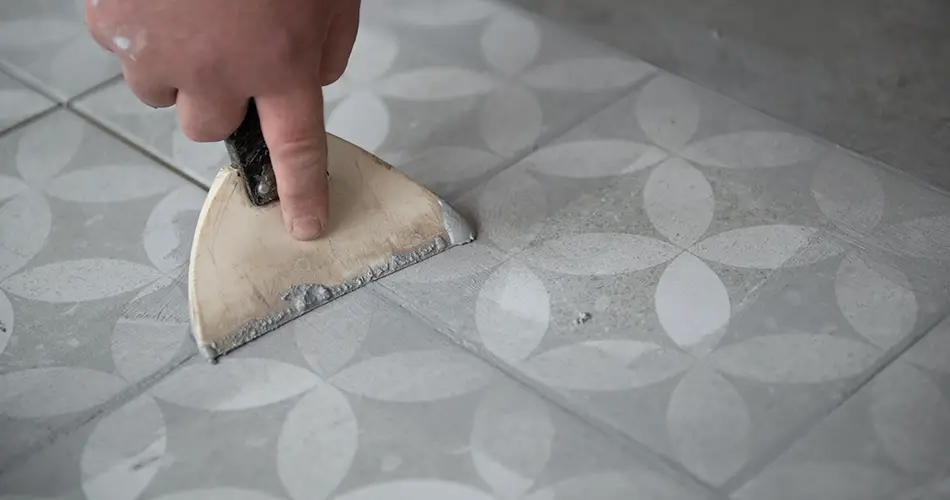
Grout is made up of materials such as cement which are designed to harden as they dry. The hardness of grout is important, as that’s what keeps your tiles in place. However, this does make grout quite tricky to remove. Fortunately, a tool called a grout rake or grout remover can help.
The long blade on a grout rake acts as a saw to make an incision in the grout line that you want to remove. The pointed end of the rake helps to scrape old grout out from between the tiles.
To start, run the blade down the centre of the grout line a few times in one direction. Do this for every grout line you want to remove. It’s a bit like scoring a piece of paper or card with a knife.
Next, dig the pointed end of the blade into the grout and move the tool down the line, always working in just one direction. Apply pressure as you do this, helping to scrape out the grout. Where possible, try to remove all of the grout from the tile gap. However, if a particular grout line is being difficult, try to ensure you remove at least 3mm to give yourself a good depth for regrouting.
In most cases, there will be a small amount of grout left that clings to the very edges of the tiles. This can be removed using a chisel. Simply use the chisel to lightly knock the grout off, as if you were using a hammer. Take care not to hit the tile itself, or scrape the tile, if you want to keep them.
The final step is to clean up. Sweep or vacuum up any loose bits of grout from the area, and use a damp sponge to clean the tiles. You may need a tile sponge to remove any small remnants of grout.
Tips & Tricks
- Line the edges of the tiles with masking tape to reduce the risk of damage as you’re working.
- Protect the area you’re working in by laying drop cloths and covering sinks and basins.
- Always wear protective eyewear and a dust mask to reduce the risk of injury.
Can Power Tools Remove Grout?
Yes. Along with manual tools like a grout rake, some power tools can be used to remove old grout. Look for an oscillating tool with a dedicated grout removal blade attachment. It’s best to avoid using tools that aren’t specifically designed for the job as they could damage your tiles. You may still need to use a grout rake to remove small remnants of grout that the power tool can’t scrape out.
Reapplying Grout To Tiles
Once all the old grout is gone, you can apply new grout in exactly the same way you would if you were tiling from scratch. Make up the grout to the manufacturer’s instructions, or pop open your tub of ready-made grout. Then use your grout float to apply and press the new grout into the grout gaps.
As always, use a damp tile sponge to clean up excess as you go, to avoid grout hardening on your tiles. It’s also a good idea to wipe down your tiles when finished, and, after around 10 minutes, to ensure all residue is removed. Most grout products should be fully dry after around 24 hours.
Is Regrouting Old Tiles Worth It?
Regrouting tiles takes time. It can also be quite labour-intensive, especially if using a manual tool. However, the process is much quicker than retiling a room – it’s more cost-effective, too.
You will need to ensure you have the right products and the right grout. However, purchasing these items will be much less expensive than it would be if you also had to buy brand new tiles and adhesive.
From a cost perspective, regrouting is well worth the effort, particularly if your tiles need a bit of a refresh. Regrouting tiles costs can be determined easily by using our simple grout calculator.


